
Agate with quartz crystals inspired this reverse intaglio carving project, turning a flawed slab into a unique and eye-catching piece. This project started with me finding a small slab in my tumbler after it had finished the polishing step. It had small quartz crystals embedded within the agate material.
When Crystals Are Cab-Worthy
I usually don’t work with materials that have these crystals. These crystals represent unstable areas that are not durable enough to withstand the stress of making a cab. But not all slabs with quartz crystals are lost causes. In this case, these crystals had survived the stresses of being tumbled. The crystals were embedded and showed minimal pitting. I felt they might just be strong enough for carving, especially since they were encased in protective agate. Because of this, I felt this piece would work for my purposes. I liked the transparency of the crystals, so I decided to do my reverse intaglio carving on the piece.
What Is Reverse Intaglio Carving?
This technique involves carving a design into the back of a transparent or translucent stone. When viewed from the front, the design appears to float within the stone. It’s delicate work — and highly rewarding when done right.
Tools I Used for This Project
-
Diamond ball bur
-
Half-inch-thick diamond wheel
-
Diamond V bur
-
Round ball bit
-
Small wood dowel
-
Red fingernail polish
-
Isopropyl alcohol
Having the right tools made each step smoother, even the rescue mission!
Getting Started
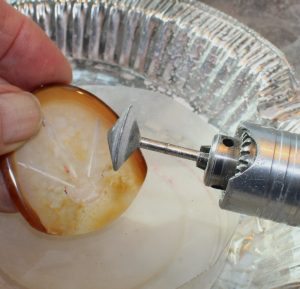
I started my carving by shaping the bottom of the cab to make it symmetrical with the upper areas. Then I drilled a hole, using a diamond ball bur, in the back lower center of the cab. I marked the lines for the beams radiating out from the drilled hole. Next, the marked lines were carved with a half-inch-thick diamond wheel. These carved lines served as a guide path for the diamond V bur.
Running into a Problem & Rescuing It
As I proceeded with the carving, it became obvious that there was a problem with the transparent areas showing well, but the adjacent areas didn’t do so well. The image transmitted to the front didn’t have the translucency or clarity that met my standards, so I had to stop and reconsider what to do to rescue the piece.
Pro Tip – Salvaging a Failed Carve: If your design doesn’t show well from the front, don’t toss it yet. Consider using subtle color enhancement techniques, like diluted polish or mica powder, to bring out detail.
I didn’t have many options, so I had the idea to enhance these areas with some red fingernail polish. Initially, I just used it at full strength. But full strength overwhelmed the lines and they weren’t distinct. I removed the color with the diamond V bur and round ball bit. My final step was to dilute the polish with alcohol. I carefully reapplied the polish and cleaned the deepest part of the V-shaped beams with the alcohol on a flattened small wood dowel. This gave the beams a distinct line that enhanced their appearance.
Coloring Carvings: What Works
-
Nail polish (diluted with alcohol)
-
Watercolor pencils (sealed)
-
Alcohol inks
-
Oil paint thinned with mineral spirits
Each medium has pros and cons, depending on the stone’s texture and the depth of your carving.
I am happy with the appearance of this piece.
Cabochon Carving Steps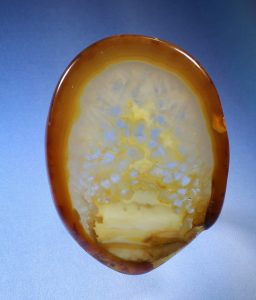 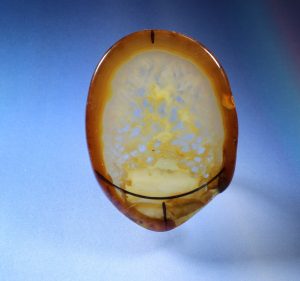 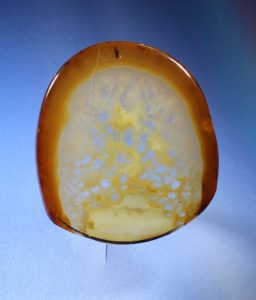 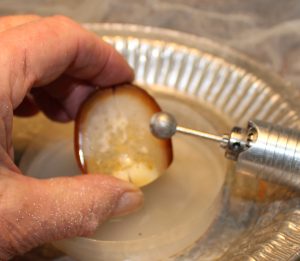 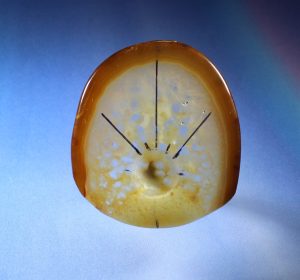 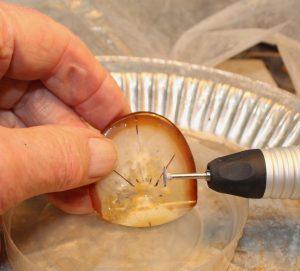
|
This story about agate with quartz crystals previously appeared in Rock & Gem magazine. Click here to subscribe. Story by Bob Rush.


