By Bob Rush
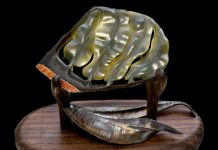
A few years back, when my wife and I were invited to show our display case at the Tucson Gem & Mineral Show®, I was wandering around the showroom drooling over the phenomenal minerals and spectacular gems that were displayed and being sold by the many dealers at the show. One thing that really caught my eye was the sculptural gems that multiple-award-winning stone cutter John Dyer (johndyergems.com) had at his booth.
In Awe of Award-Winning Sculpture Gems
They were faceted and carved, with round features in the backs of the pieces. He was rather busy, but I did have a few minutes to discuss these round features, and I was really impressed by how they enhanced the attractiveness of the already beautiful pieces. I came away from the encounter with the idea that, someday, I would try to do some cabs with this decorative technique.
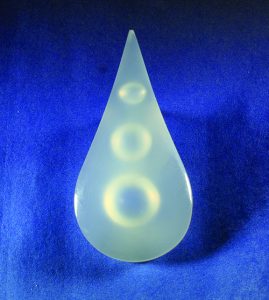
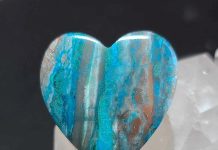
Recently, I came across an advertisement in a magazine that had a photo of a carved piece of my current favorite material, milky chalcedony, set in a gold pendant. The piece was made by Utopian Stone (utopianstone.com), and it had circles carved in the back. This was the inspiration that motivated me to try to learn how to carve these features into the back of a cab. With this task in mind, I bought a set of round 36 grit diamond burs in sizes from 1?8 inch up to 5?8 inch in diameter at a recent show. During the fabrication process, it became apparent that I should have also gotten a 220 grit set of burs.
In all the drilling, grinding, sanding and polishing activities be sure to wear suitable eye protection for the task at hand.
Working With a Teardrop Shape
I preformed a teardrop-shaped cab from milky chalcedony and placed three burs on the back to determine the layout of the holes. I drew a vertical line down the center of the back of the cab so I could ensure that the holes would be centered and in a straight line. While holding the cab underwater in a small aluminum pan, I located the holes on this line and drilled a 1?8-inch starter hole for each one. I then drilled each one with the appropriate-sized bur down to about one-half to two-thirds of the thickness of the cab.
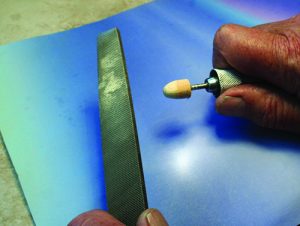
To sand the holes, I used tumbling grit on wooden wheels. I cut ½-inch lengths of 7?16-, ½- and 5?8-inch soft wooden dowels, and mounted them on screw-tip mandrels. With the mandrel in the flex shaft handle, I spun the dowels and shaped them with a coarse file to fit the holes.
For sanding, I used 220, 400 and 600 tumbling grits, and for polishing I use Propolish or cerium oxide.
Making Use of Grit
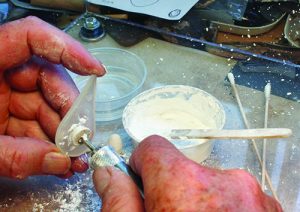
I use small plastic condiment cups to hold the sanding and polishing grit or powder and add water to the cups to make a heavy slurry. I dip the wooden wheel into a cup of water, then use a small, flat, wooden spatula to spread the slurry on the wooden wheels and into the drilled cavities.
After sanding and polishing the cavities, I finished the piece with standard cabbing techniques.
Adding these features to the back of the cab opens a new window to the creative options in making cabs.


 A professional within the lapidary industry since 1958 and metal work and jewelry since 1972.
