
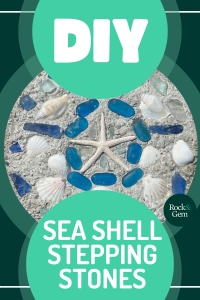
DIY garden stepping stones with shells are a perfect make after a trip to the beach equals lots of sand and fun finds to bring home including shells and sea glass. But once you get everything home, what do you do with it? Your best pieces can be displayed in your room. But most of us usually have some that aren’t the best but are still favorites. Here’s how to use those pieces and turn them into a stepping stone to put in your garden or even to give as a gift to your friends and family.
Hint: Personalize your gift stone and make it a sentimental favorite by putting your handprints into it.
What You’ll Need
- Pre-Mixed Concrete
- A Mold
- Vegetable Oil or Parchment Paper
- Water
- Shells or Other Ocean Finds
- Five-Gallon Bucket
- Small Shovel or Tool for Mixing
Craft stores and home improvement stores carry pre-mixed concrete. For most DIY projects, a 10-pound bag is plenty to create a few garden stones. If you want to make lots of stones, it’s more economical to purchase a 50 or 60-pound bag.
Get creative with your mold. Craft stores have lots of fun plastic molds or you can use something simple such as an old cake pan or even an aluminum pie plate. Consider different shapes like rectangles. An aluminum lasagna or cake pan works perfectly for this because it’s inexpensive and the stone is easy to remove from the pan. The sky is the limit!
It’s helpful to grease or line your mold with parchment paper so your finished stepping stone is easier to remove.
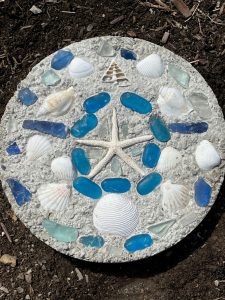
Make sure to have all your shells and treasures ready to use and have some idea of your design so that you’re not scrambling when the concrete is wet and ready for decoration. There’s no right or wrong way to decorate the stepping stones. Do you want to have a center shell as the focus? Would you rather use lots of smaller shells to make a design? It’s up to you!
Steps to Make Garden Stepping Stones 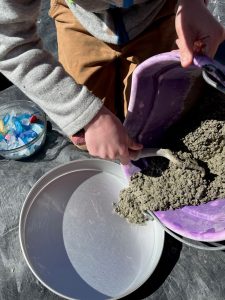 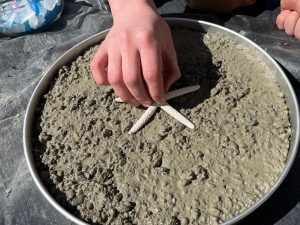 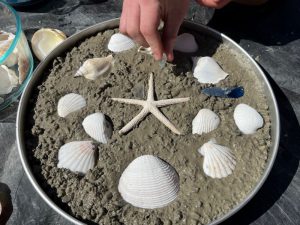
|
Working With Concrete
Always remember safety first when working with concrete to make garden stepping stones. Wear a mask to prevent inhaling the fine dust until it’s thoroughly wet and wear gloves to protect your hands.
Concrete is a geology lesson unto itself. Normally called “Portland Cement,” it is a combination of calcium oxide, iron oxide, aluminum oxide, or sulfate that hardens, through a process called hydration, when water is added. The aggregate gives the end product added strength.
Mixing the concrete isn’t an exact science because humidity and other factors affect how much water is needed. Start by adding roughly five pounds of the pre-mixed concrete to the bucket and pour in a cup of water at a time. Add additional cement and water and mix until the end product is a slurry. You shouldn’t be able to make a mud patty with it, but it shouldn’t be soupy. The consistency should be like chunky peanut butter.
Creating the Garden Stepping Stones
Carefully pour your concrete mixture into your greased or lined mold until it is even with, or just slightly below, the top of the mold. Shake the mold to level the concrete.
Place the shells, sea glass and any other decorations you have on hand firmly into the concrete. For larger pieces, nestle them into the wet concrete so they hold firmly when dried.
After decorating, place the stepping stone in a cool, dark place. The chemical process that makes concrete generates heat so it’s best to set your stone in a garage or the shade. In extreme heat over 80°F, consider sprinkling the stepping stones with water to slow the curing process and create a stronger end product.
Make sure to give the concrete enough time to cure so you’ll have a long-lasting stone. After roughly four days, the concrete is strong enough to remove from the mold, but keep it in a cool and dark area for another two weeks so it’s fully set. Once properly cured, stepping stones last for years, practically indefinitely.
This story about how to make garden stepping stones with shells previously appeared in Rock & Gem magazine. Click here to subscribe. Story and pictures by Amy Grisak


")
