Story and Photos by Russ Kaniuth
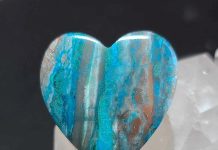
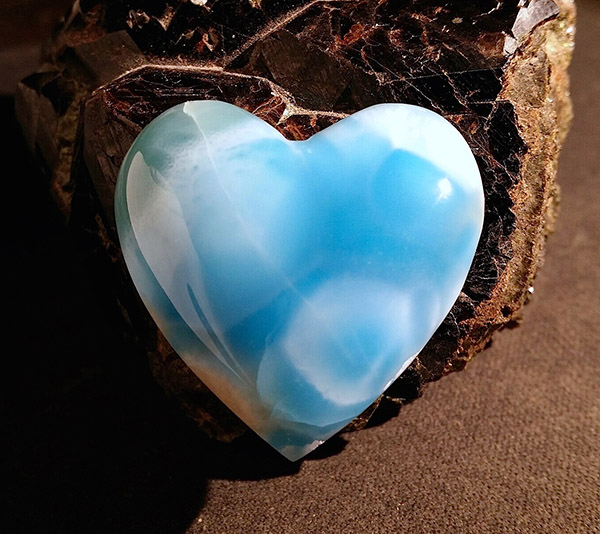
Larimar is a very beautiful and distinctive-looking stone found in the Caribbean. The stone itself is actually a pectolite (calcium-sodium silicate); however, its blue, blue-green and white hues, as well as the fact that it stems from one location, make it a one-of-a-kind stone. The difference in pectolites that gives larimar its distinctive blue coloring comes from the copper replacing the calcium.
Although the stone was originally found over 100 years ago, it wasn’t until Miguel Fuentes rediscovered it in the mid-1970s that it was introduced into the jewelry world. The stone’s name combines part of his daughter Larissa’s name (Lari-) and the Spanish word for “sea” (mar).
Time and Money Investment
Larimar has a notorious love/hate reputation with lapidary artists: love of its beauty and hate for the difficulties of working with this material. Though it’s a relatively hard material, it tends to fracture, chip, flake and break on you at the most inopportune times!
Larimar can be a little on the pricey side, so it’s best to experiment with cutting and cabbing this material very slowly, and maybe not starting with the highest grades. Shopping for Larimar is relatively easy; it’s found almost everywhere online, and is sold at almost every rock show.
When purchasing in person, its best to wet the stone lightly, wipe off any excess water, and carefully watch the stone under a light as it dries. The vast flat areas will dry first, and any cracks that may not be visible at first will start to appear, as they will hold in excess water. Once you have decided on the slabs, even if they show no signs of any fractures, don’t be fooled; the stone can split and separate on you at anytime during the cabbing process.
Prep the Saw Blade
Take as many precautions as you can through each step. First, make sure you put a newer blade on your saw before cutting out any preforms. An older blade that’s a bit wobbly and creates any excess vibrations can cause this material to split and break apart. When starting your cuts, always go slowly and allow the blade to do the work; pushing aggressively can cause larimar to split.

Once all your preforms have been cut and you’re ready to start cabbing your material, never start on an aggressive grit wheel. There are many techniques that can be used, but this is the way I’ve always done it.
I start the cabbing process on a slightly used 180 grit steel wheel. Using a hard wheel to start can certainly cause problems, but a slightly used one will have been broken in and will be a bit smoother and not too aggressive.
Light Touch Goes a Long Way
Proceed with a light touch and grind down to your outlines. I like to do this by turning the stone straight up against the wheel and not horizontal to it, like I generally do. This way usually gives me the best chance at not chipping big chunks off the backside. Once it’s shaped, I’ll start doing a 45º angle on the side to the top edge very gently, leaving a 3 mm girdle edge.
From there, I start from the top center and work the material gently, rounding over the sides to develop my dome. Always do this in light circular motions to eliminate gouges or scratches that will be tough to remove later.
After this tedious stage is done and your cab is shaped with a nice dome, move on to the soft wheels. Cab as you usually would, but gently, and take breaks frequently, giving the stone a chance to cool and not heat up due to friction. If you cab up to 50,000 grit, no extra polishing will be needed; this material will end up with a beautiful mirror finish.
Author: Russ Kaniuth
 Is the owner of Sunset Ridge Lapidary Arts and the cofounder of the Cabs and Slabs Facebook group.
View more of his work at www.sunsetridgelapidary.com.


