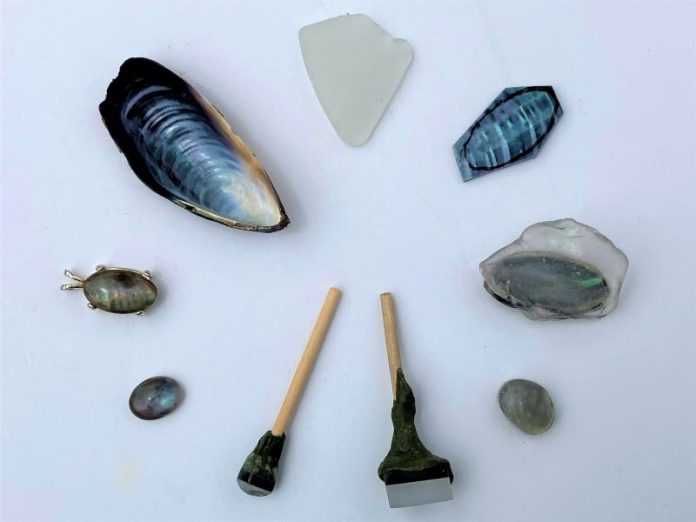
Mussel shells became a focus for me during the pandemic. With travel restricted, I treated my rockhound sidekick, Symon, to weekly dog walks along beaches minutes from my California home. There, I turned to collecting and crafting locally sourced stones. Although focused on brecciated jaspers, I grew entranced by rainbows shining in the interiors of mussel shells littering the beach. The nacre of mussels fresh from the sea shimmers iridescently. I asked Symon, “What fun, if any, might be had with this?” He just lifted his ears and cocked his head.
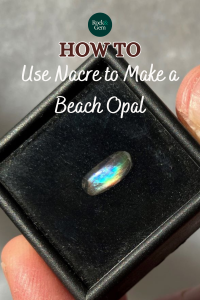
Inspired by Opal Triplets
Drawing on classes I took years before to craft Spencer opal triplets, I thought, “Why not craft a doublet from this beautiful shell to produce an ‘opal’?”
A project involving mussel shells proved more challenging than crafting opal triplets. The nacre layering of a shell’s interior is concave, curving inward like a bowl. We lapidaries more often start with flat slabs. How to cap and work a concave surface? Flat-lapping, as with Spencer opals, was not an option with curved, razor-thin nacre.
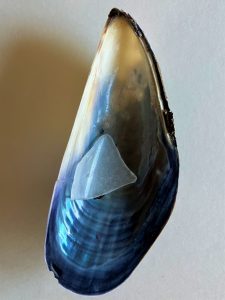
The problem was solved when I found a bit of sea glass alongside a mussel shell. As I stood pondering on the beach with a curved mussel shell in one hand, I dropped that curved bit of glass inside it. Their curves proved a perfect match!
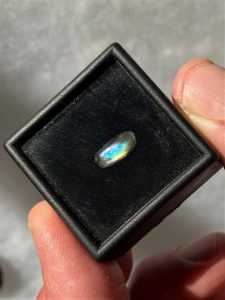
Excited, I rushed rather quickly through my first attempt. Arriving home, I cut a segment of the shell then joined it to my sea glass with epoxy. With my Genie, I shaped the whole into an oval and domed the glass top. The result? A cab shimmering almost like black opal.
I was happy with this initial result, but I had work to do to perfect the ultimate Ventura “beach opal.” The mussel was ribbed. Those ribs clearly showed unsightly bubbles emerged in valleys between ribs. But the result of this trial run was promising enough to get me out seeking ever-better shells on the beach and ever-better techniques in the workshop. I reviewed notes from my triplet class, modifying them as I went along. The following are techniques I’ve developed.
Seek Mussel Shells With Promising Color, Then Trim
Per the old GIGO adage, “Garbage in, garbage out.” In making a “beach opal,” start with the best mussel shells you can find, bearing in mind your glass cap is going to magnify any flaws. Seek large fresh mussel shells. Larger mussel shells provide bigger areas to work, and thick mussel shells allow for grinding a flat back at the end of the process. I bring home promising mussel shells and then sit them under direct sunlight. I seek spots with promising color and more-or-less flat surfaces then use a Sharpie to outline those spots.
Next, I cut away excess shell using a trim saw with a 4-inch diameter blade. Several manufacturers produce such saws: Grave’s, Ameritool, Raytech and Hi-Tech. I use a Coffey’s Tiny Trim that I bought used and cheap. If you don’t have one, get a model from a reliable manufacturer intended for trimming faceting rough and soft stones like opal or turquoise.
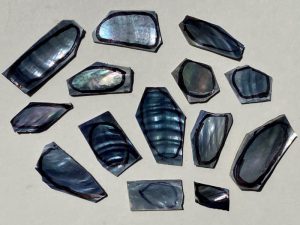
Most trim saws are safe for fingers. Not these! Such diamond blades are ultra-thin and will cut flesh as well as shells and glass. Take care and use water, not oil, in the coolant reservoir. Oil would interfere with glue bonding later in the process.
Match the Cap to the Curvature of the Mussel Shells
Whenever on the beach, I watch for sea glass. It’s not easy, especially since I must compete against sea glass professionals. These are usually older women armed with hand rakes and plastic baggies who take umbrage if you dare cast your gaze toward “their” beach gravel.
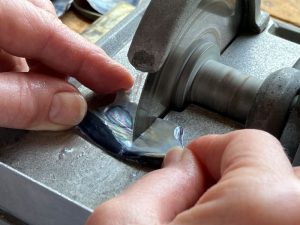
Still, I’ve managed to fill two jars with varicolored glass. I pick out the frosted white pieces and seek ones that are good fits for the shell I’ve cut. If I’m lucky, I have bits of shell and glass that are both flat. But that’s the exception. More often, I must move to the grinding wheels on my Genie a couple of times to lightly grind the surface of my sea glass with the 220 and 280 wheels to best fit the shell and to get it down to a smooth surface that still leaves a measure of roughness to grip a glued seam. Proceed slowly and meticulously and use your sense of touch to gauge when you’ve achieved the best fit between the shell and glass cap.
Good Gluing Makes For Good Bonding
Prior to gluing, clean the shell and glass to eliminate grit or other debris. Even oil from fingers interferes with a glue bond. Use cotton swabs dunked in acetone and thereafter hold both shell and glass by the edges or use tweezers.
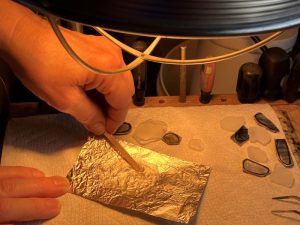
Now mix a batch of epoxy. Hughes Epoxy 330 has several advantages: it dries water-clear, has high tensile strength and resists thermal shock. Mix resin and hardener on a small bit of aluminum foil under a heat lamp with a 100-watt bulb. Heating lowers the viscosity of the glue. Stir slowly for a minute. If you stir too quickly and don’t heat the glue, the result can be innumerable bubbles.
There are different types of epoxy. One is “quick drying,” i.e., bonds in minutes. Instead, go with a variety that recommends setting aside for 24 hours. Epoxy 330 sets in two hours, but leaving it overnight ensures a bond of maximum strength. Crafting a doublet is best done with patience, so give each step its due. As you heat the epoxy, also heat your shell and glass with your lamp several inches above them.
Spread glue on both shell and glass using a toothpick or coffee stirrer. Gently roll the two together and press with a twisting motion. This squeezes out excess glue along with bubbles. If not expelled, so-called “air bells” will appear as white or silver spots in the finished product. You can leave it at that or use a clothespin as a clamp and leave the doublet overnight.
“Cold Dop” to Preserve the Glue Bond
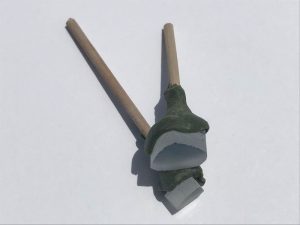
Once the glue has bonded, trim the piece to your desired shape to get maximum yield. To finish off, move to a grinding unit. While some like to grind cabochons by hand without a dop stick, most “beach opals” are going to be small and thus prove difficult to hold and control with fingers alone. You’ll want to use a dop stick but be careful!
Normally, in dopping you heat the stone then attach the dop stick with hot melted wax. However, all this “hot” can cause problems with the seams of your doublet by softening the glue. Instead, proceed with “cold dopping.” Keep your doublet at room temperature and attach it to the hot dop.
DefinitionsOpal Triplet: An “assembled opal” composed of three parts: a layer of opal between a backing for strength and a clear domed cap for protection and intensified play-of-color. Doublet: A composite made of two components; for instance, domed opal glued to a basanite backing or a domed quartz cap atop a flat-lapped opal. |
Grind a Dome to Concentrate Light
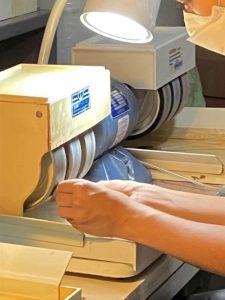
Now it’s simply a matter of doming as you would with any cabochon, with some special considerations. With opals, it’s the light that matters. The value of an opal is its presentation of a shifting spectrum of light, or play of color. While opals exhibit this naturally, the glass cap of a triplet or doublet not only provides protection for the finished product but also concentrates light to enhance the play of color. That concentration can vary with the height of the dome.
Generally, grind a medium to low-medium dome. High domes with too much glass give an artificial look. They also allow light to pass through the sides, interfering with play-of-color. Cutting too low or flat reduces the magnifying effect of the cap.
As always, proceed slowly and meticulously, checking often. Per owners of the Spencer Opal Mine, “Many people ask us which is better to use [in crafting an opal triplet], a high or low dome cap. We use whichever type does the most justice for the stone.” As you grind, start high. Then wet and check the glass often as you grind down to arrive at the best effect.
Be careful as you grind to avoid overheating your doublet and thus weakening the glue bond. As to shape, rather than going with templates, it’s best to go free form to maximize the amount of color you get from your shell. To finish, bevel the back edges 20 to 30 degrees, leaving the cap as the widest part of the doublet. If your shell is thick enough, you should also flatten the back on your grinding wheel or a flat lap.
Caring for Your “Beach Opal” Doublet
Every author on doublets and triplets warns not to wear them in dishwater, bath water or swimming pools. Remove “beach opal” rings in all such situations. The glue can weaken if moistened and water can infiltrate between layers causing the doublet to take on a hazy appearance. Air bubbles might creep in under the clear cap, or parts might separate altogether. Also, don’t use ultrasonic cleaners or steamers. Finally, glass caps can chip and break should you strike a surface. Take care that your doublet doesn’t get banged, particularly if set in a ring.
Celebrate Spectacular Failures
While lapidaries normally show off dazzling successes, we learn more from our spectacular failures. Here are mine and the reasons behind them so you can succeed more often than not.
My first mistake goes back to GIGO. Be discerning in selecting rough. While opals are precious and few, not so mussels. Fresh supplies wash up every day. If you don’t live near an ocean, go to a restaurant and order seafood stew for two (and, for glass, pick up bits of broken bottles along a road). Go for bigger shells and reject those that don’t offer good potential, realizing that flaws are going to be magnified under the glass cap. Discard far more than you use.
My second big mistake? Gluing. While you can find some smooth flat spots, much of the curved interior surface of mussel shells is ribbed and those ribs show—sometimes in nice ways; other times, not so nice. It’s not nice when you don’t sufficiently heat the glue to reduce its viscosity and bubbles emerge in the valleys between ribs or in other gaps between shell and glass. To lessen the chance of bubbles, heat the glue and roll the shell and glass together. Also, an inadequate seal or gaps around the edges lets in water and air when working the doublet under a spray of water in the grinding/ doming stage, so allow the glue to cure fully before grinding.
Eventually, I discovered another problem. Some of my “beach opals” have faded with time, just as mussel shells bleach under a hot beach sun. I don’t know if this is a natural process with mussel shells and if all my “beach opals” will fade away, or if a gap between the cap and shell allowed in the air to take away the sparkle.
A Promising Future Full of Play and Color
While a couple have faded, most of my “beach opals” continue to shimmer with iridescent beauty. Results have been promising enough for me to keep at it, crafting what I call the “poor man’s doublet” due to my use of such freely available materials.
Is this opal? Definitely not! Am I being conniving calling it such? Definitely so! Will my “beach opal” last? I don’t know. Will the poor man’s doublet catch on? We’ll see!
This story about using mussel shells to produce ventura “beach opal” previously appeared in Rock & Gem magazine. Click here to subscribe. Story and photos by Jim-Brace Thompson.


