
Rock tumbling is the gateway activity to lapidary, the craft and art of creating with stones and gems. Tumbling stones is how I started on my lapidary journey…
Getting Started – A Personal Story
I began tumbling rocks with my three daughters and it was not only fun and educational, but it was also addictive. When my daughters were young, my wife and I introduced many new potential interests to them. I bought a camera, telescope, microscope, and other tools of professions for them to try. They pursued some, but not all, of these interests. However, after several months of rock tumbling with my daughters, I am the one that got the lapidary bug and I have never looked back.
Rock tumbling is not difficult and has the lowest cost of entry into the lapidary crafts and arts. Although the process takes some time, there are many rewards along the way. It is something you can do alone or with your friends and family and it gets you away from your phone, tablet and computer.
What is Rock Tumbling?
Tumbling rocks is the process of eroding the surface of rocks so they become smooth. This is similar to the process that rocks go through naturally in a stream to become round and smooth but we accelerate the process from years to weeks. Tumbling involves a series of repetitive steps using abrasives, polishes and a tumbling machine.
Understanding Grit
The different abrasives and polishes are graded using the measurement of grit which is a measurement of particles per inch. Grit for abrasives and polishes can range from 30 to 14,000. A “30 grit” abrasive means that it takes 30 particles placed in a straight line to equal one inch. The abrasives are harder than the rocks that you are tumbling and abrade the rocks and make them smaller and smoother.
You start at a lower grit and move to higher grits for each tumbling step. Each step uses a finer grit that takes out the rougher surface (scratches) of the previous grit. The steps are repeated in a process that eventually smooths and shapes the rocks and brings them to a polish. Here is an example of the process.
1. 90 grit (optional)
2. 220 grit
3. 400 grit
4. 800 grit
5. 3,000 grit
6. Burnish (optional)
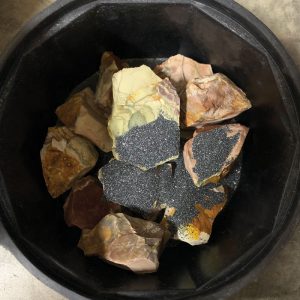
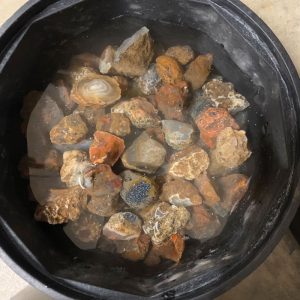
The rocks, water and abrasives are placed in the tumbler’s barrel. The barrel is placed on the tumbler base and the barrel is rotated for five to seven days. In between each step, the rocks and the barrel are cleaned and the water and abrasives are disposed of properly. Clean water and abrasives are added to the barrel with the rocks and the process begins again.
Getting Started
Here is a list of what you will need to start tumbling.
1. Tumbling Materials
2. Tumbler
3. Abrasives and Polishes
4. Water
5. A place to dispose of the abrasive-laden water
6. A place to set up your tumbler where the noise is not bothersome

Tumbling Materials
It is called rock tumbling, but you can tumble beach and sea glass, gems, minerals, fossils and more. The important thing is for all the items in a tumbling barrel to have the same level of hardness. You do not want a hard item to ruin a softer one. If the Mohs hardness of the rocks is too different, the softer ones will never polish. It is better to have separate and multiple tumbles with like-hardness stones than to put them together. You can determine the hardness of your tumbling candidates using different methods.
• Buy material from a company that sells tumblers and supplies. Ask for rocks with the same hardness.
• Look up the tumbling material’s hardness online by searching “Mohs hardness scale.” This will give you examples and lists of various materials with their hardness or at least within a close range of a half number. Example: Tumbling stones with a Mohs hardness of 6 and 6.5 is probably going to be okay.
• Buy a Mohs hardness test set and test your rocks.
• Test your rocks by trying to scratch them against each other. Rocks of the same hardness will not scratch each other.
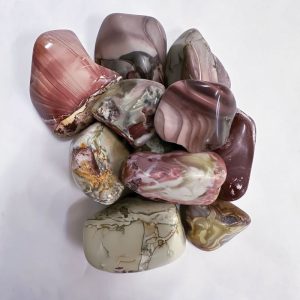
There are many sources for rocks for tumbling – local and online rock shops or find them yourself. Many people that rock tumble, including myself, prefer colorful rocks like agates and jaspers. The good news is that agates and jaspers are the same hardness.
I would recommend starting with colorful agates. I also recommend using agates that are similar in size and shape for your first few tumbles. As you become familiar with the process and results, you can try different materials, sizes and shapes. Agates can vary in price based on size and color, but in general, they are moderately priced.
Types of Rock Tumblers
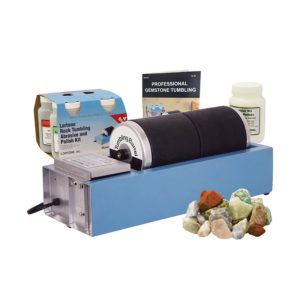
Rotary Tumbler – I recommend starting with a rotary tumbler. A rotary tumbler has a sealed barrel that holds the rocks, abrasives and water. The barrel is placed on a base that rotates the barrel and allows the abrasives to wear down the rocks. The rocks are tumbled for five to seven days at which point they are removed and cleaned before starting the next grit.
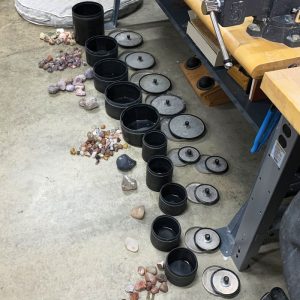
The rotary tumbler is the least expensive of the tumblers and the easiest to use. You can buy hobby, intermediate or professional-grade rotary tumblers. One of the best things about rotary tumblers is that you can buy a single base that holds multiple barrels. This allows you to tumble rocks at different grits at the same time and set up a progressive process.
Vibratory Tumbler – The vibratory tumbler is a more advanced tumbler that uses a vibrating motion to move the rocks around the abrasives and water. Although the vibratory tumbler is faster and more efficient, it demands more attention and regular checking of the water level, whereas the rotary tumbler does not need daily tending. The vibratory tumbler is recommended once you have the basic rotary tumbling process perfected and are ready to move to a more advanced machine and process.
Sonic Tumbler – The sonic tumbler is the most sophisticated and expensive tumbler. It does not use any moving parts which gives it a long life expectancy. It operates at a high frequency producing up to 3,500 vibrations per minute. The sonic tumbler is used more for gem-grade material and metal.
Rock Tumbling Tips
• Keep a journal of dates, materials, barrels and grit sizes.
• Follow the process outlined in the tumbler manual. After you get good at tumbling, then you can consider taking shortcuts or adding steps.
• Be aware that your tumbler is going to make noise. Personally, the tumbling is background white noise to me. However, this is not the case for my wife. She finds the noise of the rocks tumbling irritating.
• Do not pour the water and abrasives down your drain! The water and abrasives will eventually harden and block your drain.
Waste Disposal
• Put the water and abrasives in a bucket and let the water evaporate and dispose of the remaining solid abrasives with your normal trash disposal.
• Dig a small hole in your yard and pour the water and abrasives into the hole. Please check with your local municipality before you use this method.
• Call your local waste management authority and follow their recommendation.
This is not a fast process, but each step has its own reward. Be patient and remember what Ovid said, “What is harder than rock, or softer than water? Yet soft water hollows out hard rock. Persevere.”
This story about rock tumbling for beginners previously appeared in Rock & Gem magazine. Click here to subscribe. Story by Mark Oros.


