By John Speck
As I discussed in the first part of this series (published in the March 2019 issue) the process of transforming the idea of hosting lapidary classes into a reality involved many elements, equal amounts of effort and patience, and tremendous support from fellow members of the Southwest Gem and Mineral Society in San Antonio and the Northside Adult & Community Education program.
And like all good things, it’s been worth every moment and step in the process.
Overreaching Interest
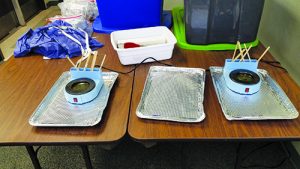
As preparations were coming together, in the back of my mind I could not forget people telling me that no one would be interested in studying gemstones and learning lapidary. There was a minimum number of students necessary for a class to form, and I was planning to teach two courses, Introduction to Gemstones and Lapidary Arts. Weeks before the first classes started, I was watching online to see if anyone would register.
Introduction to Gemstones was scheduled to start February 19, 2017. Truth be told, this was not my favorite course, but I saw it as an important course leading into my lapidary classes. About two weeks before the class started, the magic number of five students was reached. From there it grew daily. The day the course started, the class registration reached 20 students. Now I had a new problem: teaching 20 students was very different than teaching five. I quickly adjusted my lesson plans for the larger class.
Class Curriculum
My lesson plans include a focused discussion about turquoise, including presentation of cabochons of natural turquoise, stabilized turquoise, fake plastic turquoise, variscite, chrysocolla, azurite and dyed howlite. Students try to guess which cabs are authentic turquoise and then we discuss each stone. The students learn that not all blue stones are turquoise.
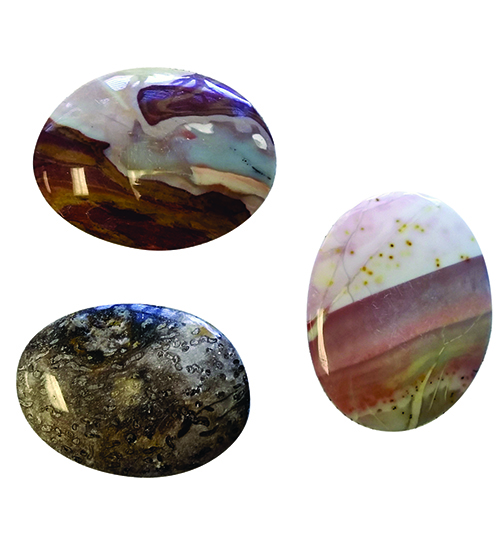
Another lesson topic is gemstone values. I present cabochons of morrisonite, Willow Creek jasper, Bruneau jasper, tiger eye, Sonora sunrise, Rio Grande agate, unakite, petrified wood and petrified palm wood. As a group, the students try to guess which cabs are most valuable. This leads to a great discussion of rarity and value.
In addition, I present display of birth stones, wherein a rough stone and a finished stone is shown for each month. The mystic power of each stone is also discussed. I would like to digress, at this point, and get on my soap box for a bit. As rockhounds, many people often ignore the mystic side of stones.
In researching material for my classes, I spent some time reading about metaphysical stones and talking to people who believe in this, of which there are many. I do believe that some stones can help in the meditation process and I believe that meditation is good. There is one large rock shop in Austin and a major area of the shop is dedicated to metaphysical stones. I believe that we as rockhounds need to embrace all people that enjoy rocks and gems if we wish to survive and thrive.
Back to the curriculum. We also discuss rock collecting in Texas. This includes a discussion about what the Southwest Gem and Mineral Society has to offer including rock hunts. A rock hunting checklist is presented and discussed.
Cultivating Lapidary Appreciation
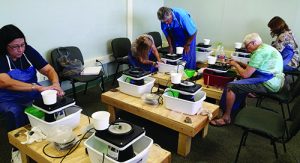
Additional elements of the curriculum include discussion of rock collecting references, and the presentation and discussion of various rough and finished stones, to help students become familiar with the characteristics and stories behind each.
March 2, 2017, was the first Lapidary Arts class. Two weeks after the course catalog came out, the class was at max attendance. The second Lapidary Arts class, with a start date of March 24, 2017, filled up a week later.
It was becoming clear that there were indeed people who wanted to learn about gemstones and lapidary.
Class Structure
Each Lapidary Art class begins about an hour early for me, as I arrive to set up each station. The class officially begins with an introduction to the subject and equipment orientation. Then students select a slab from a tub of pieces chosen by me for the their high probability of initial lapidary success. I supply the slabs for the class, as I’ve accumulated several hundred over the years. The slabs are mostly agates and jaspers.
Each students is then asked to select two slabs that are large enough to cut a 30 x 40 cab. To my surprise, the greatest problem for most of the students was to limit themselves to two slabs. The students’ enthusiasm is a great confirmation of the value of what we’re trying to do.
As my goal in writing this series of articles is to share my experience and provide a blueprint for others to follow, I’ve provided specific details, but hopefully they will help others interested in developing their own class.
The next stage of the process involves students learning how to mark their slabs for cutting, using permanent black markers and the special double templates. Next, each student cuts the slabs on one of the two 6” Rock Rascal Model J slab saws. As I mentioned earlier, all students wear safety glasses and plastic shop aprons.
Tackling Grinding
After sawing, the cab stones are attached to wooden dowel
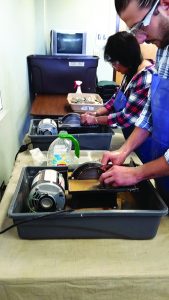
rods using one of the two Dop Buddys. The rest of the process in accomplished on the All-U-Need units.
In most cases, the initial grinding is done with an 80 grit grinding disc. For softer stones, students can start with the 180 grit disc. Next in the process is the 220 mesh sanding disc. The standard All-U-Need unit does not include the 220 mesh, but I feel that going from the 180 to the 325 is too much of a jump. After the 325, the student goes to the 600, then the 1,200 and finally, the 3,000. As I also mentioned before, I added the 80 grit, the 220 mesh and the 3,000 mesh, because after teaching several classes, this turned out to be a highly satisfactory combination for grinding and polishing.
One of the things I enjoy most about teaching these classes is learning new things from the students in return. For most stones it is important that all visible scratches are removed at the 220 mesh stage. I use a headband magnifier to check the students’ cabs for scratches. Due to the high cost, we only have four headband magnifiers, so people share. While checking a student’s cabs, which looked great with no scratches, I noticed she was not using a magnifier, so I asked her how she knew the scratches were all gone. She told me it was easy and she showed me how she took a picture with her cell phone then enlarged it. I was amazed at how well this worked.
Turning to Technology
As it turns out, the cameras on new cell phones are very high resolution and small details are still visible after being enlarged. There’s always something new to learn.
When I told my son about the camera resolution, he said ‘Really, Dad, everyone knows cell phone cameras are very high resolution’. Then he added a magnifier app to my cell phone. For those of us that are still living in the ‘stone age’ but have a cell phone, this is something good to know. I can see many applications for a rockhound.
A frequently asked question by students is how much pressure to apply while grinding and polishing? After a great deal of thought, I came up with the following analogy. It is called “petting the kitty.”
I tell students to pretend they have a cat lying on their lap that they want to pet. You want to put enough pressure on the cat so it can feel it, but not so much pressure that it hurts. This seems to work well as an explanation for most students. But even if it didn’t, it is a fun analogy.
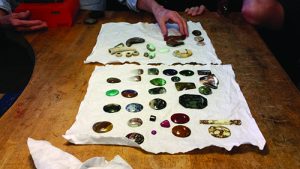
For most stones, a nice polish starts to appear somewhere between the 325 to 600 mesh. This is my favorite part of the process. It is so rewarding to see the reaction of beginning students when they see the hidden beauty of what they are creating for the first time. This is the point where most students become hooked on lapidary. Each time this happens, I remember the first time I polished a cabochon all those years ago. As the students begin finishing their cabs and display them, an energy is created in the classroom that is contagious.
Building Community
I feel it’s important I continue to stay in contact with students after classes end. I maintain an email list of former students that I send out to announce class dates, upcoming rock club meetings, the annual rock show and other interesting lapidary information. Current and past students are encouraged to contact me if they have any questions. Many of the students have joined the Southwest Gem and Mineral Society so they receive this information. I simply want everyone to feel that we are community, and I am there to help them with the hobby.
My courses are now listed as Lapidary Arts (Beginning and Advanced) in the Northside Adult & Community Education course list. In order to encourage students to return and take the course again, I state that “advanced students require less supervision and will be allowed to work with a larger range and more challenging lapidary materials.”
In the classroom, there is a second tub of slabs marked “advanced students.” This tub includes slabs of jade, tiger eye, Willow Creek jasper, royal imperial jasper, Stone Canyon jasper, chrysocolla, bloodstone, cheetah jasper, picture jasper, plume agate and moss agate just to name a few.
Beginning students are shown these as an encouragement to take the class again. This strategy seems to have worked. My classes are now about half and half, beginning and advanced students. Plus, advanced students often help beginning students when I am busy helping others.
Mineral Society Support
When the Southwest Gem and Mineral Society agreed to purchase the equipment, I agreed to set up the equipment at the club’s annual rock show to provide a hands-on demonstration opportunity for show attendees. This may sound silly, but I purchased several finished 30 x 40 cabochons for about $3 a piece and then I tumbled them for one day in rough grit, followed by placing them on a dop stick. For $10 people can select a cabochon and polish it during the show. The process takes about 45 minutes for someone polishing for the first time, and in the end the finished cab is theirs to keep.
During our March 2017 show, about 40 people took advantage of this opportunity, which we call the Mini-Lapidary Course. Many more also signed up for information about the classes I teach. This was a great success at the show, and it generated a lot of interest and resulted in many future show attendees and students.
There has been another side-benefit for the club. When I designed the Introduction to Gemstones class, it was divided into several distinct modules each lasting about 30 minutes. This comes in handy if for any reason a scheduled speaker can’t make it to a monthly meeting of the Southwest Club, because I can quickly fill in with one of the modules.
Attracting More Attention
Word-of-mouth has been an effective way to spread the story about the lapidary classes.
Many of the students make jewelry and chose my class so they could learn to make their own cabochons instead of having to settle for buying cabs. Some of the students take jewelry making courses at the local school of art. A few months ago, I was contacted by one of the school’s directors. She had heard about me from her students and wanted to know if I would consider teaching a weekend lapidary class at the school. I said yes, and the course was listed in the the fall catalog. The class filled up in less than a week and was held for two days in September of 2017. It was a great success.
The class at the school of art had a different approach. A few of the students asked if they could bring some of their own material on the second day. This was a first for me, but I said OK. The material that the students brought in was varied. It ranged from rough sapphire to deer antler. This was a real challenge for me since I had not screened the materials beforehand.
One student told me he purchased the rough stones many years ago while serving in the army overseas. He had always wanted to see what it would look like polished. One of his sapphire stones cut and polished into a beautiful cab with six rays. The idea of letting advanced students bring in their own materials was new to me, but turned out to be rewarding for all of us.
Connecting Students and Club Members
When this process started, I was concerned that club meetings may not be as exciting and new members would not return. With this in mind, I requested as part of the project that our club host a mini rock and mineral show before each monthly club meeting.
Members who are current with their dues may bring rocks, minerals, fossils, and jewelry, to show/trade/sell. Space for each member is limited so everyone has a chance to display. This has worked out very well. It makes the meetings more interesting and promotes discussions among members, whether they are new or long time members.
In an effort to keep people interested in repeating the advanced lapidary course, I continue to think about where to take the program. A natural progression for the program is to coordinate my classes with people who are teaching jewelry making like wire wrapping, lost wax casting, silver/brass soldiering and precious metal clay. In August of 2018, a member of the Southwest Gem and Mineral Society and excellent wire wrapper, started teaching wire wrapping at the Northside Adult & Community Education program.
Now we coordinate our classes and have several students taking both courses.
The gemstones course consists of two three-hour sessions and the lapidary course consists of three three-hour sessions. To date, I have taught the gemstone class 10 times and the lapidary class 19 times, and each has been at maximum capacity.
Sometimes you do get what you wish for. To date, the success of the program has surpassed my greatest expectations. I have met many wonderful people and helped build an exciting lapidary community. The rock club has gained several new members with the promise of more in the future. I hope the successes described in this article will serve to inspire others to develop programs for their rock clubs. It is vital, for the survival of the hobby that we all love so much, that we are able to attract new members and maintain the interest of existing members.


