Story and Photos by Kathleen Fink
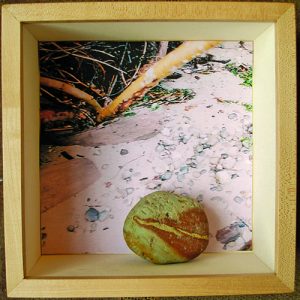
There are many ways to share our love of rocks, the environments in which they are found, and the stories they have to tell. Recently, I have been experimenting with placing a rock and a photograph in a small shadow box. I find that displaying the image and object together in a way that tells a story adds a dimension to the appreciation of each.
Although I used a purchased shadow box, it is clear to me that expensive materials are not required. For example, a child might enjoy taking a beach picture and placing that inside a cardboard box, together with a rounded pebble or two. An Internet search will reveal sources for purchasing shadow boxes, as well as instructions for making them. A frame shop may be able to make a custom shadow box in the exact dimensions needed to accommodate a specimen.
Related Projects Set the Pace
Before turning to the challenges I encountered with these boxes, I would like to share two related projects that were particularly satisfying. A lapidary friend agreed to help create a photographic record of the whole process from locating a new picture jasper source to creating finished cabochons. It turns out I made the request of the right person, as he told me that making custom cabochons from rough he finds himself is one of his favorite things to do.
As a result of this project, I have the first cabochons cut from Coyote Ridge claim jasper. My pendant may look like a sandy beach, but my friend and I both know it also carries the sound of coyotes singing in the Idaho hills. What is more, I have pictures of that original outcrop in its beautiful surroundings and of the slabs from which the cabochons were cut.
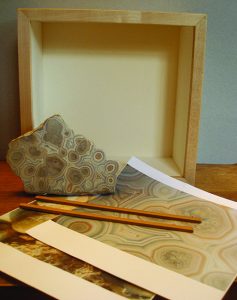
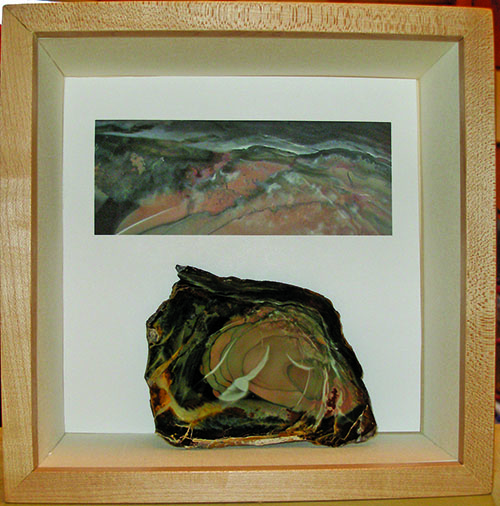
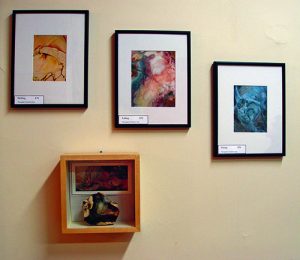
Particular sections of colorful, highly patterned Morrisonite jasper look like art to me. I began taking a series of close-up photos using a digital camera with super macro capability, and was able to capture an amazing level of detail. Folks found all kinds of images, from baby bonnets to demons, in these patterns. When the opportunity presented itself to show three of my framed close-ups at an open studio event, I decided to use a shadow box so that those attending could see how the enlargement related to its specimen source.
Stones Inspire Interchangeable Fittings
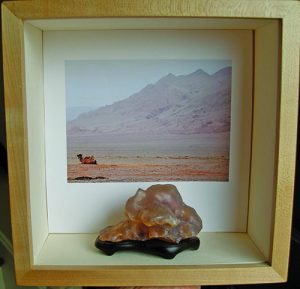
After that show, I kept thinking of new ideas for shadow boxes using stones in my collection. Instead of making lots of boxes, I made a series of interchangeable fittings and took a picture of each assembly as I completed it.
Each variation presented its own challenges. For example, the object and the photograph needed to be of similar levels of aesthetic interest to balance each other. I found that focused images worked better than those with too much variety. The way the stone sat in the box mattered, as did the position and size of the photographic image. In a number of cases, I needed to try three or four times before the overall composition came together. In the end, these “difficult” shadow boxes were among my favorites.
Taking the photographs presented its own set of challenges. When polished specimens were involved, I carefully positioned them to minimize light splashes and reflections, and sometimes waited for an overcast day. For those interested, Photographing Minerals, Fossils, & Lapidary Materials, by Jeffrey Scovil (Geoscience Press, 1996), provides expert assistance on how to use rigs and polarizing filters to achieve consistently good results.
Photographic Consideration
One of the considerations composing shadow boxes was whether I already had an
appropriate photograph or could take one to support my idea. For the most part, I limited image manipulation to basic cropping, size adjustments, and placement on the page. I saved images using recognizable file names and found a separate draft folder was very useful for making experiments. If I plan to publicly exhibit my shadow box, I always get permission before using another photographer’s work.
After printing the final format on heavy paper, I carefully cut out the 7½-inch square that fits the back of my shadow box. I used a cardboard template to assist with this, but a cutting line could easily be added to the format.
Final assembly was the simplest part of making these shadow boxes: I placed the image in the back of the shadow box before placing the rock or other object on the surface in front. If I want to keep a particular version up on my wall for a while, I add two thin strips of wood to either side of the square to hold it in place. These strips of wood fit tightly, so no glue is required.
Shadow Box Topics
Field trips and lapidary projects are just two of the more obvious subjects around which to create a shadow box. The relationship between the image and the object need not be immediately obvious to others for a shadow box to be highly meaningful to you. If I could locate a photograph of a coyote singing that I liked, I could make a most interesting shadow box with that and a piece of Coyote Ridge jasper. If anyone asked about this unusual combination, I would have a most interesting story to tell.
For those of us who love taking pictures, collecting rocks, and sharing the special stories certain stones have for us, a shadow box is a natural creative outlet.
 Are you intrigued by this article about creating shadow boxes to display rocks, gems, and minerals?
You can enjoy more articles like this and about a variety of topics with the purchase of a one-year subscription (12 issues) to Rock & Gem for just $29.95. That’s a savings of 71% off the newsstand price.


