By Bob Rush
Spencer opal is found in eastern Idaho. It formed in a rhyolite-obsidian flow with incompletely filled gas cavities. It usually presents as very thin but brightly colored layers. Some layers are thick enough to make a cabochon, but it is rather rare.
Don’t Be Limited By Layers
To utilize the thin color layers, it must be made into an assembled cabochon with three layers called a triplet. The top layer on the cab is made of laboratory-grown quartz crystal. Natural quartz crystals can be used, but it is difficult to find an area of clear material in these crystals that would be suitable for our purposes. The middle layer is the very thin layer of colored Spencer opal. The back layer is made from basanite, a true black basalt.
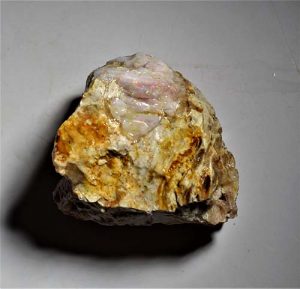
The first step is to examine the Spencer opal rough to find the opal layer. Within the nodule cavity, you will see parallel flat layers of common opal interspersed with one or more color layers. You need strong light or bright sunlight to see these layers. Using a trim saw, remove the outer rhyolite matrix to isolate the opal material. Very carefully trim the opal down close and parallel to the color layer. Cut very slowly and carefully, so you don’t cut into the color layer and ruin it.
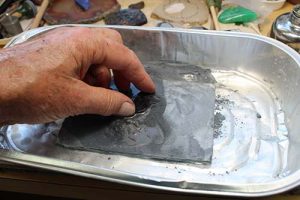
Slowly grind away the common opal overlying the color layer with a fine grinding wheel to remove most of the covering layer. Grind a little and look a lot. With a flat lapping machine slowly grind the final amount down to the color layer. I use a piece of common window glass in an aluminum pan with tumbling grit and a little water to lap the material down to the color. Again, go slowly and look a lot.
Bright Means Time for Backing
When you reach the brightest color, you are ready to apply the basanite backing. Using the lapping process with 400 grit flatten one side of the basanite until it has an even frosty appearance and no saw marks. Do the same with the quartz piece. On a piece of white paper and using a small wood spatula mix the two parts of the epoxy 330 with a swirling action until you can’t see any swirl marks in it. DO NOT whip it or you will introduce bubbles.
Pick up a small bit of epoxy and slowly wipe it across both surfaces. Do not dab it on!
(BOB RUSH)
Bring the two pieces together at one edge and close them together like closing a book. This will push the excess epoxy out one side and carry any bubbles with it. Squeeze it between your fingers to get any excess epoxy out from between the pieces. Set it aside on the piece of paper near the unused epoxy. I like to put it under a lamp to heat it slightly. Let it set overnight. Test the unused epoxy to see how much the pieces have set up.
Next, work the remaining opal down slowly to the color by grinding and lapping it the same as before. Watch carefully and keep grinding it until you get the brightest color. At this point the opal will be very thin, perhaps a few thousandths thick.
Finishing the “Fingerprint” Stone
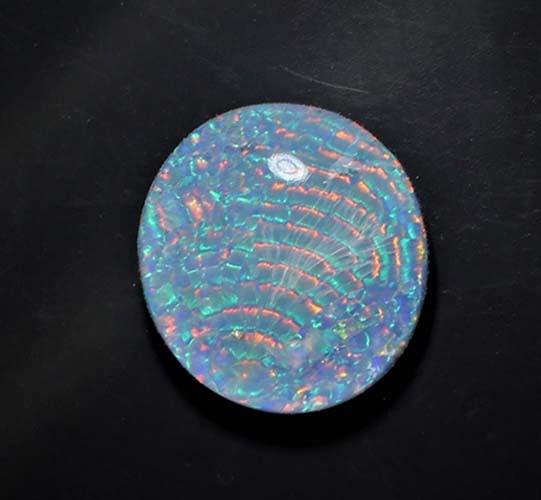
Mix and apply the epoxy the same as above. Additionally, apply a thin coat to the top of the quartz so you can see into the piece to observe if you have trapped any bubbles and set it aside to cure. Cab the piece as you normally would but add a slight reverse taper to the basanite layer so you can’t see it from the front. The result will be a startling cab. I call this my “fingerprint” stone.
Author: Bob Rush
 A professional within the lapidary industry since 1958 and metal work and jewelry since 1972.
He teaches at clubs and Modesto Junior College.


